Copyright (c) Hyperion Entertainment and contributors.
AmigaOS Manual: Workbench Fundamentals
This chapter describes the elements of the Amiga Workbench including:
- Screens
- Menus
- Windows
- Gadgets
- Icons
- Requesters
Screens
A screen is one of the key features of the Amiga's display system. The screen is an area of the monitor display with a given display mode and set of properties, including the resolution, size, and number of colors. Screen resolution is determined by the number of pixels - the tiny dots of light that make up the screen display - placed horizontally and diagonally. Different display modes are used for different purposes and present different memory and processing loads on the system. (For more display mode information, see Chapter 7.)
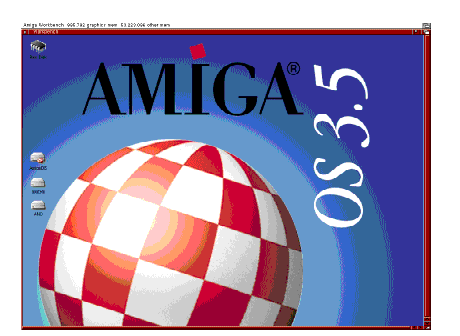
A screen is always at least the full width of the monitor display. All windows open within a screen. The Workbench screen, shown in Figure 3-1, is the first thing displayed when you turn on your Amiga or following reboot.

Using Screens
Several screens can be open at the same time. New screens normally open on top of other screens, covering them. To view and access screens that are covered by others, drag the frontmost screen down or use gadgets or keyboard shortcuts to depth-arrange them. When working with screens, remember these helpful hints:
- Use left Amiga+M to page through open screens.
- Use left Amiga+N to bring the Workbench screen to the front, regardless of how many other screens are open.
- Items cannot be dragged between screens, although the mouse pointer moves freely from screen to screen.
- Only one window on one screen at a time can accept keyboard or mouse input.
- Most screens have a title bar that you can use to move them. Screens that do not might still respond to mouse clicks in the depth area. A screen with no title bar can be dragged using the qualifier key set in the IControl Preferences editor, described in Chapter 5.
- Screens larger than the monitor's display area can be opened. The Amiga can be set to scroll the unseen areas of the screen into view when you move the pointer to the edges of the viewable area.
- A screen cannot be dragged so that the bottom of the screen rises above the bottom of the monitor display.
Dragging a Screen
If your Workbench screen, a terminal program screen, and a text editor screen are open all at the same time, you can see parts of each screen by dragging them into view.
To drag a screen:
- Point to the screen's title bar.
- Hold down the selection button.
- Move the mouse down.
To expose a screen, you can drag any screens that are in front of it down. If a screen is larger than a monitor's display area, you can drag it up or down or side to side so that you can see all areas of the screen.
To drag a screen when its title bar is covered by widows or not on the visible part of the display, hold down the left Amiga key and then the selection button. This lets you drag the screen, regardless of the mouse pointer position.
Menus
Menus are lists of commands and options displayed on a screen by holding down the mouse menu button. These commands control the actions of the program in the currently selected window. Most Amiga programs have menus for some or all of their functions. For example, you can rename a disk or copy a file by choosing items from the Workbench menus.
Using Menus
Menus vary from program to program; however, the steps used in choosing menu items are the same for all Amiga software. A program's window must be selected to see its menus. Click in a window to select it. For detailed information about using menus, see the menu button description in Chapter 2.
Windows
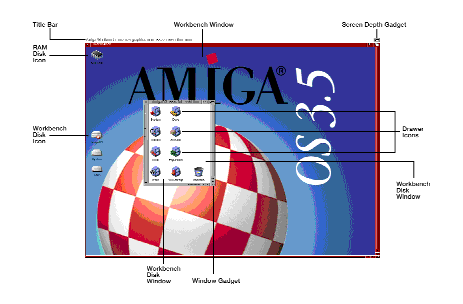
Windows are areas on a screen that display and accept information. When you first boot the Amiga, the Workbench window is displayed on the Workbench screen. When you double-click on the Workbench disk icon the Workbench disk window opens on the Workbench window, as illustrated in Figure 3-2. Many of the Workbench icons create windows when opened.

Working with Windows
A new window appears on the front of the screen when you open almost any icon. Unlike screens, windows usually cover only a portion of the display area. Although several windows can be open on a screen at one time, only the selected window can accept information. The selected window's border or frame is a different color than the other windows on the screen.
Several open windows on one screen often overlap one another. To see particular windows, arrange them using the gadgets in the window's border; as explained on page 3-7. Windows can also be manipulated using the Window menu.
The following sections describe the mouse operations that can be performed with windows, including selecting, opening, and dragging.
Selecting Windows
To select a window, click the selection button anywhere inside the window or its title bar, but not over an icon. To deselect a window, click anywhere outside that window.
When a window is selected, the frame surrounding the window changes color. Only one window can be selected at a time. The selected window is the one that accepts your mouse and keyboard input.
Opening a Window
Double-clicking on an icon opens a window or starts a program. Adjust the time allotted for a double-click with the Input Preferences editor, explained in Chapter 5.
Dragging a Window
When several windows are open on the Workbench screen, they might overlap each other. Rearrange the windows on the screen by dragging them, to show the information presented in all the windows.
To drag a window:
- Point of the title bar, but make sure the pointer is not over any of the gadgets at either end.
- Hold down the selection button and move the mouse. An outline of the window appears and moves across the screen.
- Drag the outline into position and then release the selection button. The window appears in the new location.
AppWindows
An AppWindow is a type of window that allows you to drag an icon into it to run a program or display files that the icon represents. The following are AppWindows:
| MultiView window | Displays the text, graphic, or animation represented by the icon. For more information about MultiView, see Chapter 4. |
| IconEdit window | Has three separate blocks into which you can drag an icon for editing. For more information about IconEdit, see Chapter 10. |
| File requesters | Displays the path of the files represented by the icon. For more information on file requesters see page 3-20. |
| Preferences editor windows | Presets can be dragged into the Preferences editors windows for loading. |
Gadgets
Gadgets are programmed graphic images that appear in a window, requester, or screen. Like icons, gadgets often have a raised three-dimensional appearance and when selected appear to sink into the screen. Like icons, they are selected with the mouse. Cancel the selection of button-type gadgets by moving the pointer off the gadget button before releasing the selection button.
Window Gadgets
To Be Continued...