Copyright (c) Hyperion Entertainment and contributors.
AmigaOS Manual: Workbench Using
This chapter describes the Amiga Workbench, an icon-based environment that allows you to give instructions by manipulating graphic symbols with a mouse rather than by typing in commands at a keyboard. Included in this chapter are descriptions of the following:
- The Workbench Screen
- The Workbench Window
- The Workbench Menus
- Workbench Programs
Workbench Screen
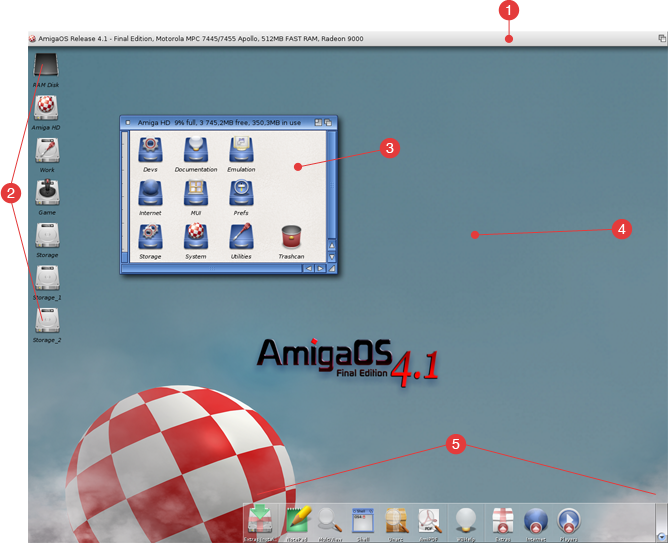
The Workbench screen, illustrated in Figure 4-1, is the primary visual component of your system. Icons and other windows appear on it.
The Workbench screen is identified by the Amiga Workbench title bar located along the top border of the display. The Workbench screen's title bar also displays the number of bytes of graphics (Chip) memory and other (Fast) memory currently available when any window, except a Shell window is selected.
The Amiga provides Preferences editors (described in Chapter 5) that allow you to customize the Workbench screen. You can define an extra-large virtual Workbench screen that is larger than the viewable area with more space for windows.
Workbench Window
When you boot you Amiga, the Workbench window fills the Workbench screen. This window contains icons for any floppy disks inserted into floppy drives, the Ram Disk, and any other icons determined by your system's configuration.
Although the Workbench window appears and functions like an application window, it is an essential part of the Workbench screen.
Workbench Menus
The workbench has the following four menus:
| Workbench | Contains options for working with Workbench and windows opened on the Workbench screen. |
| Windows | Contains options for working within the currently selected window. |
| Icons | Contains options for working with the currently selected icon or group of icons. |
| Tools | Is available for applications to use or for user-created menu items. |
