Copyright (c) Hyperion Entertainment and contributors.
AmigaOS Manual: Early Startup
This appendix describes the following special boot options in the Amiga Early Startup Control system:
- Disabling devices and processor caches for software compatibility
- Choosing display options for running games
- Diagnosing expansion board failures
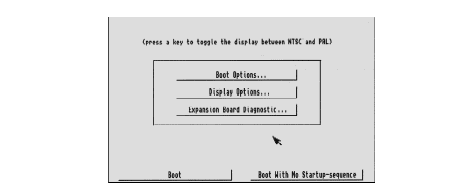
The Amiga Early Startup Control Screen, illustrated in Figure D-1, allows you to select Boot Options, Display Options, or Expansion Board Diagnostics. Access the Amiga Early Startup Control Screen by turning on or rebooting your Amiga while holding down both mouse buttons. You can toggle between NTSC and PAL display modes by pressing any key on the keyboard.
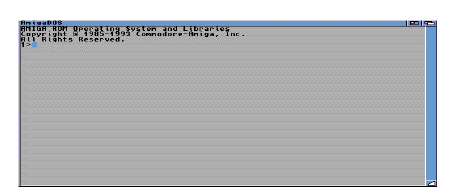
Exit the Amiga Early Startup Control screen by selecting the Boot button for a normal system boot or the Boot with No Startup-Sequence button to boot directly into an AmigaDOS Shell window.
Disabling Devices and Caches
The system software requires additional memory to support the operation of each hard disk partition or floppy disk drive. The extra memory that is used to maintain a hard disk or an extra floppy disk drive can prevent some floppy-based games from running.
Selecting Boot Options from the Amiga Early Startup Control Screen displays the Boot Options screen, illustrated in Figure D-2. This screen lets you selectively disable your hard disk partitions and any external floppy drives to leave more RAM for the programs to run.
The Amiga displays a list of hard disk partitions and floppy drives in the Select Boot Device column. The devices in this column are listed in descending priority for the system to access when it boots. You can select any of them to override the priority.
The Control Active Devices column shows the status of the devices. Clicking on the status line toggles between Enabled and Disabled. If you are disabling hard drive devices in order to free memory for games, be sure to leave at least one bootable floppy drive enabled.
| Note |
|---|
| If your system has more than one floppy drive and the game lets you use additional drives, you can leave those drives (DF1, DF2, and DF3) enabled in the Control Active Devices column on the Boot Options screen. |
The Disable CPU Caches option disables the Data and Instruction caches on 68020, 68030, and 68040 series processors. This allows you to retain compatibility with certain software that does not run properly when CPU caches are on. You should not disable caches if you do not have compatibility problems since caches significantly increase system performance. This option has no effect on systems with a 68000 processor.
Selecting Use implements your boot device choices for the current session only. When you reboot your Amiga, it returns to the same configuration as it had before you changed it. Selecting Cancel on the Boot Options screen cancels any changes you made and returns to the Amiga Early Startup Control Screen.
Choosing Display Options
Selecting Display Options from the Amiga Early Startup Control screen displays the Display Options screen, illustrated in Figure D-3. This option is only available on Amigas with Enhanced Chip Set (ECS) or Advanced Graphic Architecture (AGA) chip sets. The screen lets you select the display type and chip set that your system uses.
Users with systems containing AGA chip sets can choose the Best Available selection in which the system uses the AGA chip set. If a game or application needs either the original chip set or the ECS chip set you must select either one for the system to emulate. Users with systems containing the ECS chip set can emulate the original chip set if selected.
Diagnosing Expansion Board Failures
Selecting the Expansion Board Diagnostic option displays the Expansion Board Diagnostic screen, illustrated in Figure D-4. This screen lets you view information about and the status of expansion boards in your system. If one of your expansion boards fails, this screen is automatically displayed on boot up.
| Board Number | The number of the expansion board. |
| Manufacturer | The number of the maker of the board. |
| Product column | The manufacturer's product number for the board. |
| Status column | The status of the board: Working or Defective. |
We recommend providing the manufacturer with this information when you contact them concerning a failed board.


